Web forms
Build web forms with a public link that create a record on every submission, and see their report.
With web forms you build a form, e.g. "Contact us" or "Request a quote", that opens at its own public link. The visitor fills it in without an account, and every submission straight away becomes a new record in the app.
The list of forms
Go to Settings → Web forms.
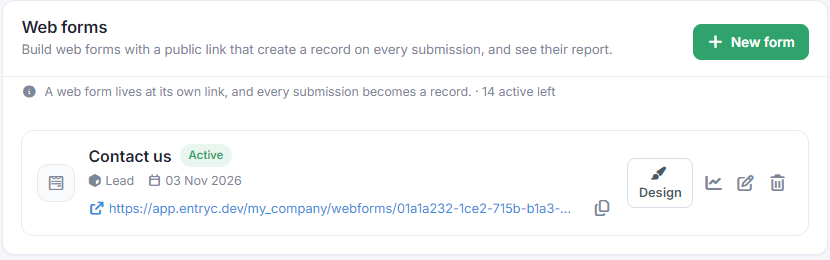
- For each form you see whether it's Active, the object it writes to, the date it was created and its public link. The icon next to the link copies it.
- On the right are the buttons Design, Report, Edit and Delete. Deleting also deletes the form's statistics, and its link stops working straight away. The records it has already created stay.
- Web forms are available from the Plus plan up: Plus up to 5 active forms, Pro up to 15, Enterprise up to 30. At the top you see how many are left. See the guide Subscription.
New form
Press New form and fill in:
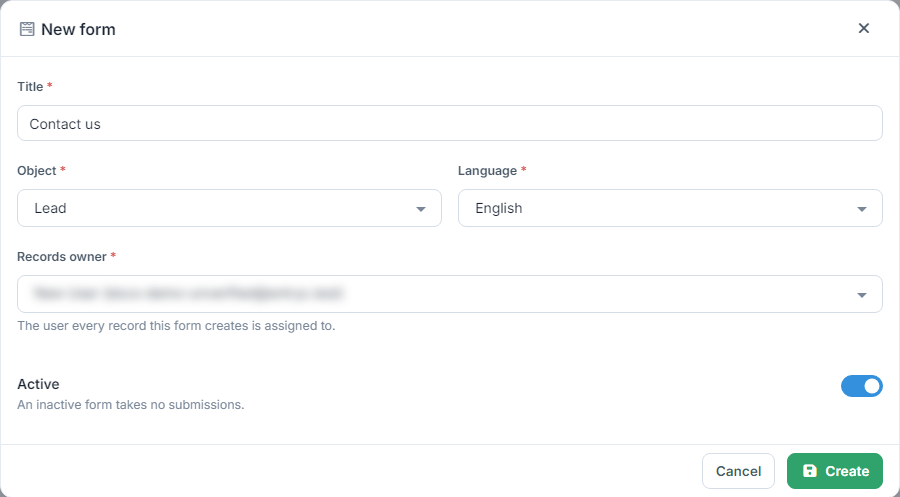
- Title: shown at the top of the form, under your company's name.
- Object: what record each submission creates, e.g. Lead or Contact. It can't be changed after creation.
- Language: Greek or English, for the messages the visitor sees. It starts in your own language.
- Records owner: the user every record the form creates is assigned to.
- Active: an inactive form doesn't open and takes no submissions. Only active forms count towards the plan's limit, so a form you don't need for now can simply be turned off.
All of these, except the object, can be changed later with Edit.
Designing a form
Design opens the form's design. In the middle you see the form as it will appear, on the right the object's Available fields and on the left the Appearance.
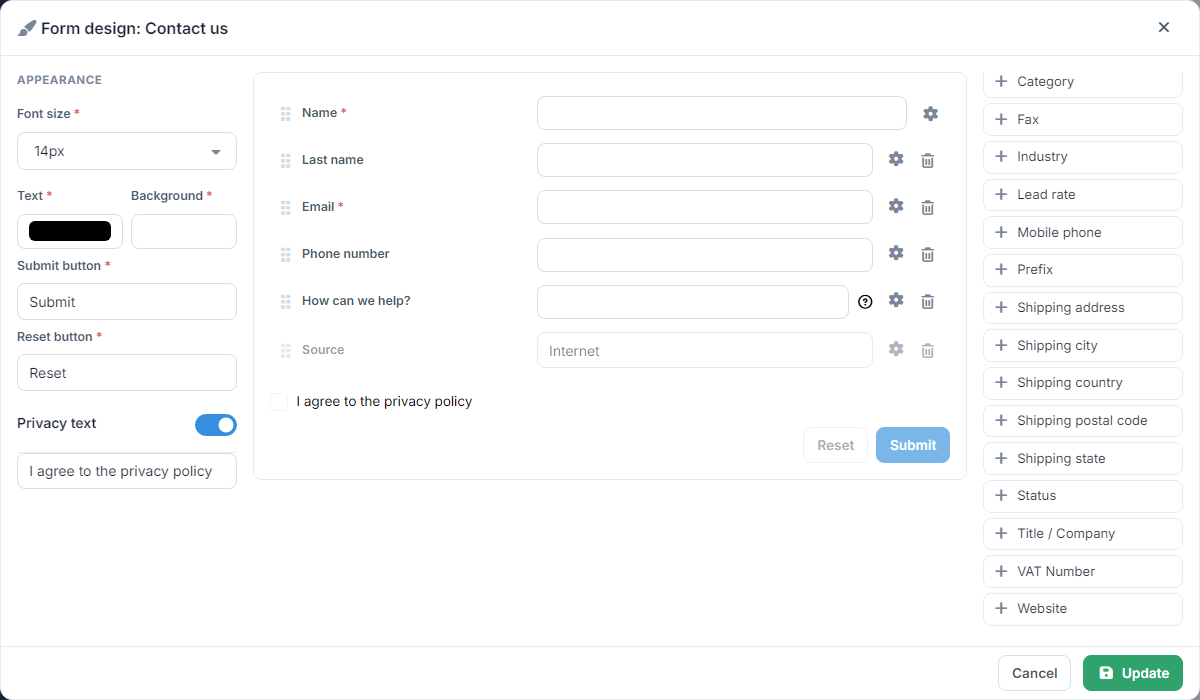
- Click a field on the right to add it to the form. Name is always there and always required.
- Drag a field by the handle on its left to change the order, and the bin icon removes it.
- Under Appearance you set the font size, the text and background colours, and the texts of the submit and reset buttons.
- Privacy text adds a checkbox, e.g. "I agree to the privacy policy", that the visitor must tick to send the form.
Press Update to save the changes.
Field settings
The gear next to a field sets:
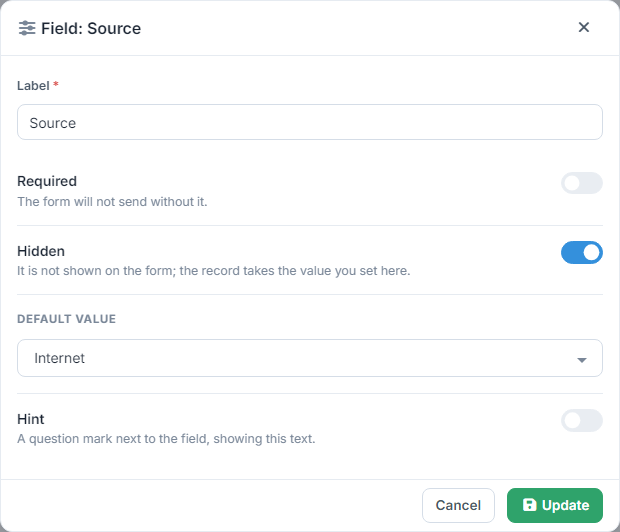
- Label: the text the visitor sees, e.g. "How can we help?" instead of "Description".
- Required: the form won't send if the field is left empty.
- Hidden: the field isn't shown, and the record always gets the Default value you set. That way you can, for example, put Source "Internet" on every record from the form.
- Hint: a question mark next to the field, showing the text you write.
Sharing the form
Copy the form's link from the list and put it on your website, in an email or in a post. Anyone who opens it sees the form with your company's name and logo.
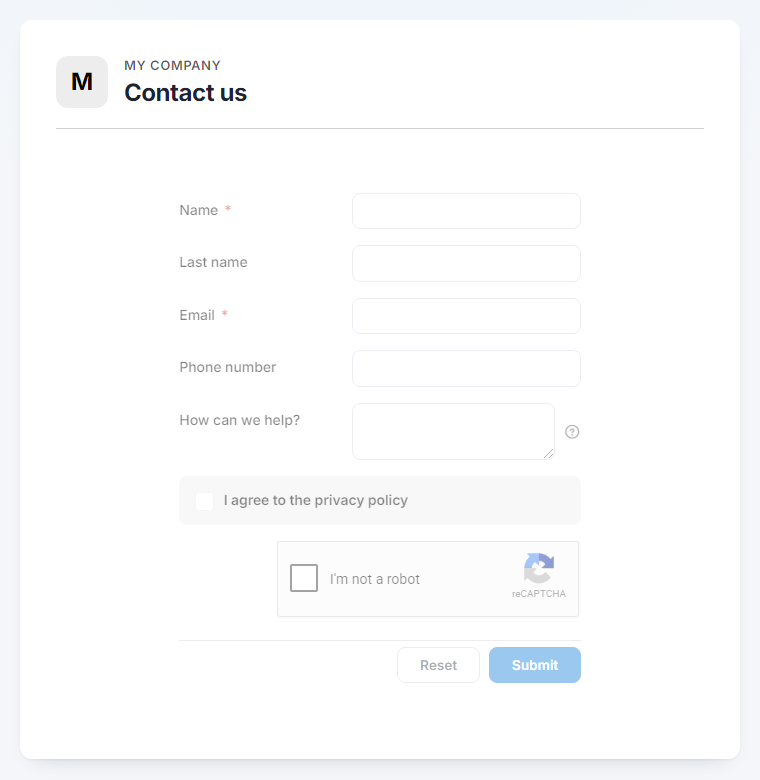
Before sending, the visitor confirms they're not a robot (reCAPTCHA). The reset button clears the form.
What happens on each submission
- A new record of the object is created, owned by the form's Records owner. Only the form's fields are saved.
- The object's workflows that have Run from a web form on are run, e.g. to send a welcome email or create a task.
- If you've reached your plan's records limit, the submission doesn't go through and the visitor is told to contact the company.
Form report
The Report button shows how the form is doing, by day, week or month:
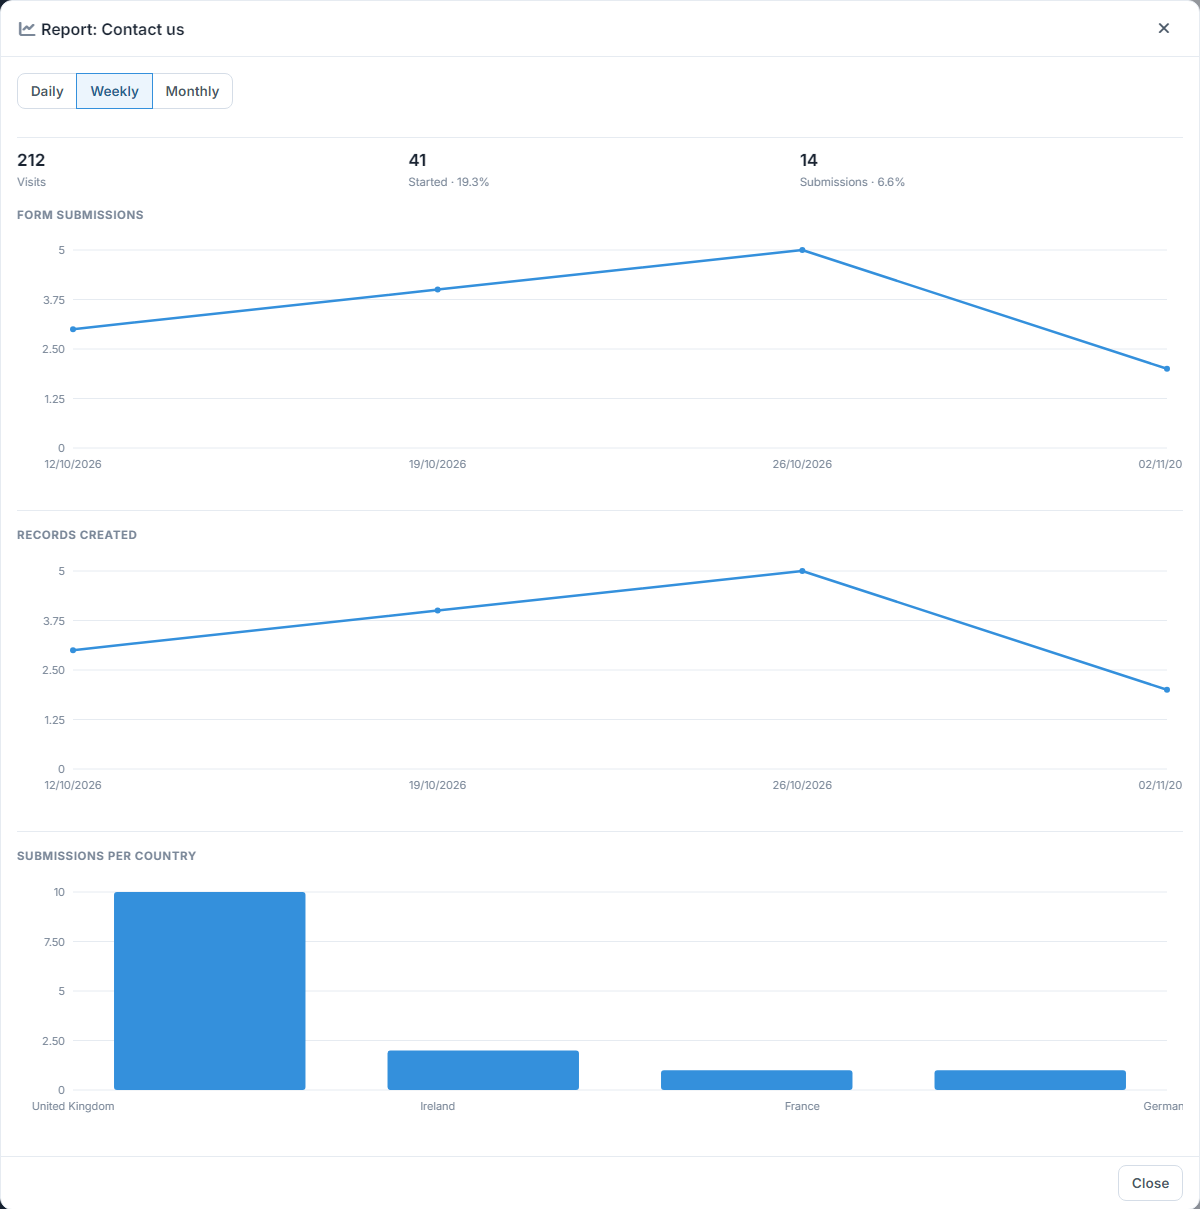
- Visits: how many times the form was opened.
- Started: how many visitors began filling it in.
- Submissions: how many sent it, and what percentage of the visits that is.
- Below you see the submissions and the records created over time, and which countries the submissions came from.